> ## Documentation Index
> Fetch the complete documentation index at: https://docs.apiany.ai/llms.txt
> Use this file to discover all available pages before exploring further.
# Integration in Cursor
> APIAny.AI API Key, Base URL und empfohlene Modelle in Cursor konfigurieren.
[Cursor](https://cursor.com/) kann sich über OpenAI-kompatible Einstellungen mit APIAny.AI verbinden. Nach der Einrichtung kannst du Chat-, Reasoning-, Übersetzungs- und multimodale Modelle im selben Client nutzen.
## Voraussetzungen
* Cursor ist installiert.
* Du hast im [APIAny.AI Dashboard](https://apiany.ai/de/dashboard/api-keys) einen API Key erstellt.
* Du hast eine Modell-ID ausgewählt, etwa `gpt-5.4-mini` oder `gpt-4o-mini`.
## Konfigurationswerte
| Feld | Wert |
| ------------------------ | ------------------------- |
| OpenAI API Key | Dein APIAny.AI API Key |
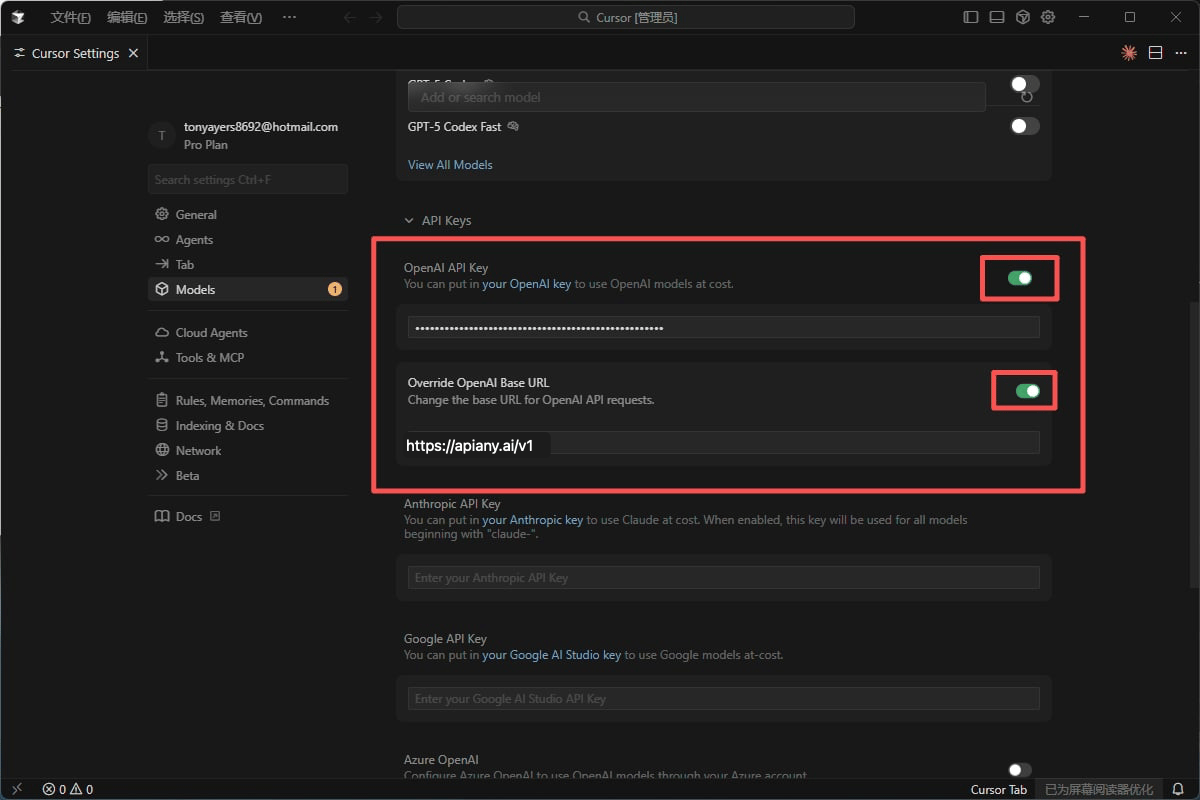
| Override OpenAI Base URL | `https://apiany.ai/v1` |
| Modell | `gpt-5.4-mini`, `gpt-5.5` |
## Einrichtung
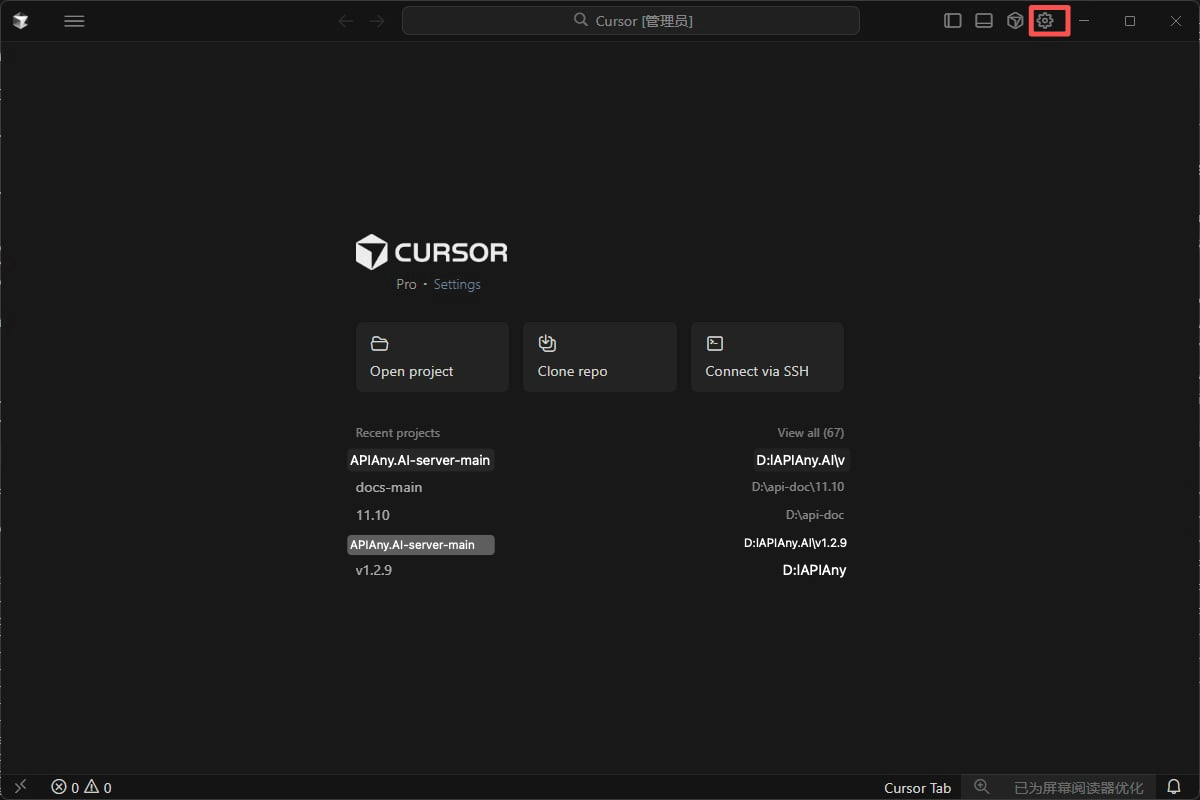
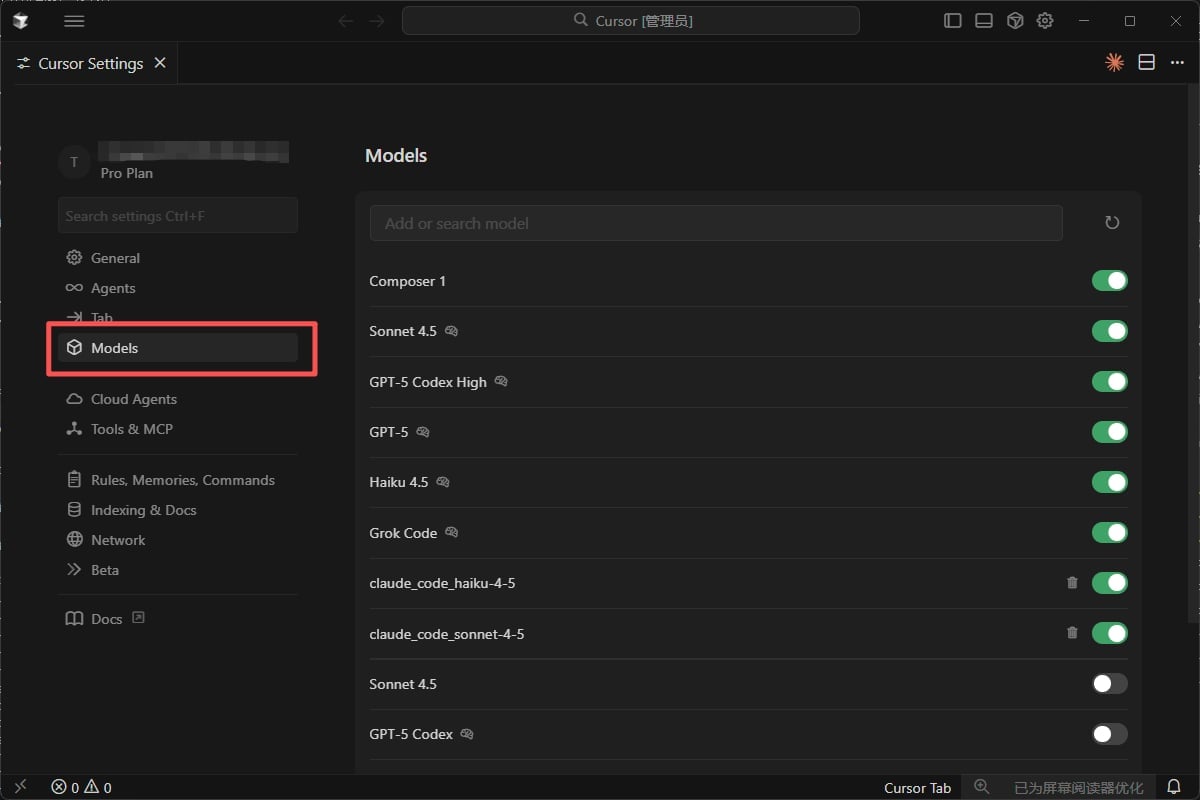
1. Öffne den Abschnitt Models in den Cursor-Einstellungen.
2. Aktiviere die OpenAI-API-Key-Konfiguration.
3. Gib den API Key ein und überschreibe die OpenAI Base URL mit der APIAny.AI-URL.
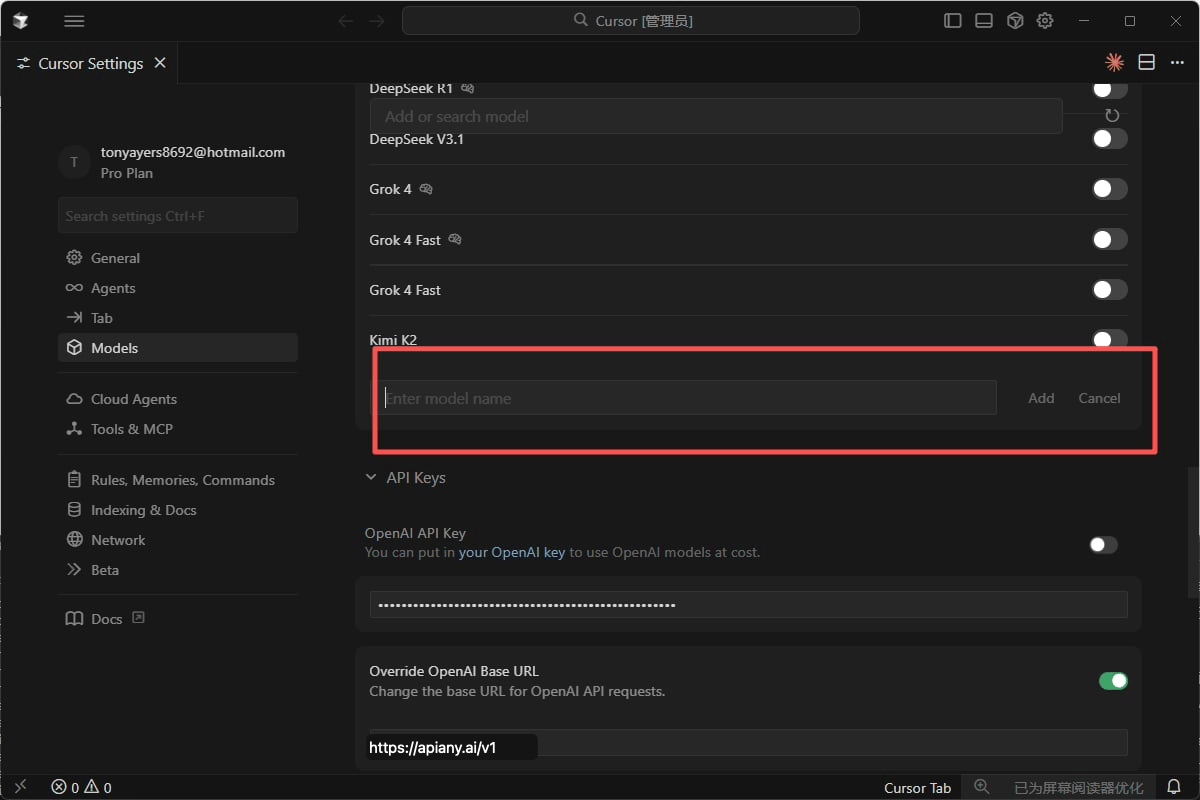
4. Füge die benötigten Modell-IDs hinzu und teste sie in Chat oder Composer.
## Empfohlene Modelle
| Modell-ID | Am besten geeignet für |
| ------------------- | -------------------------------------------------------------------------------------------------- |
| `gpt-5.5` | Beste erste Wahl für komplexes Reasoning, Coding und produktionsreife Workflows. |
| `gpt-5.4` | Starkes Allzweckmodell für anspruchsvolle Chats und Agent-Aufgaben. |
| `gpt-5.4-mini` | Ausgewogenes Verhältnis von Geschwindigkeit, Qualität und Kosten für den täglichen Einsatz. |
| `gpt-4o-mini` | Schnelle und wirtschaftliche Wahl für einfache Chats, Übersetzungen und leichtgewichtige Aufgaben. |
| `claude-sonnet-4-6` | Claude-kompatible Modell-ID für umfangreiche Schreib- und Coding-Workflows. |
| `gemini-3.5-flash` | Gemini-kompatible Modell-ID für schnelle multimodale Nutzung. |
## Anleitung mit Screenshots
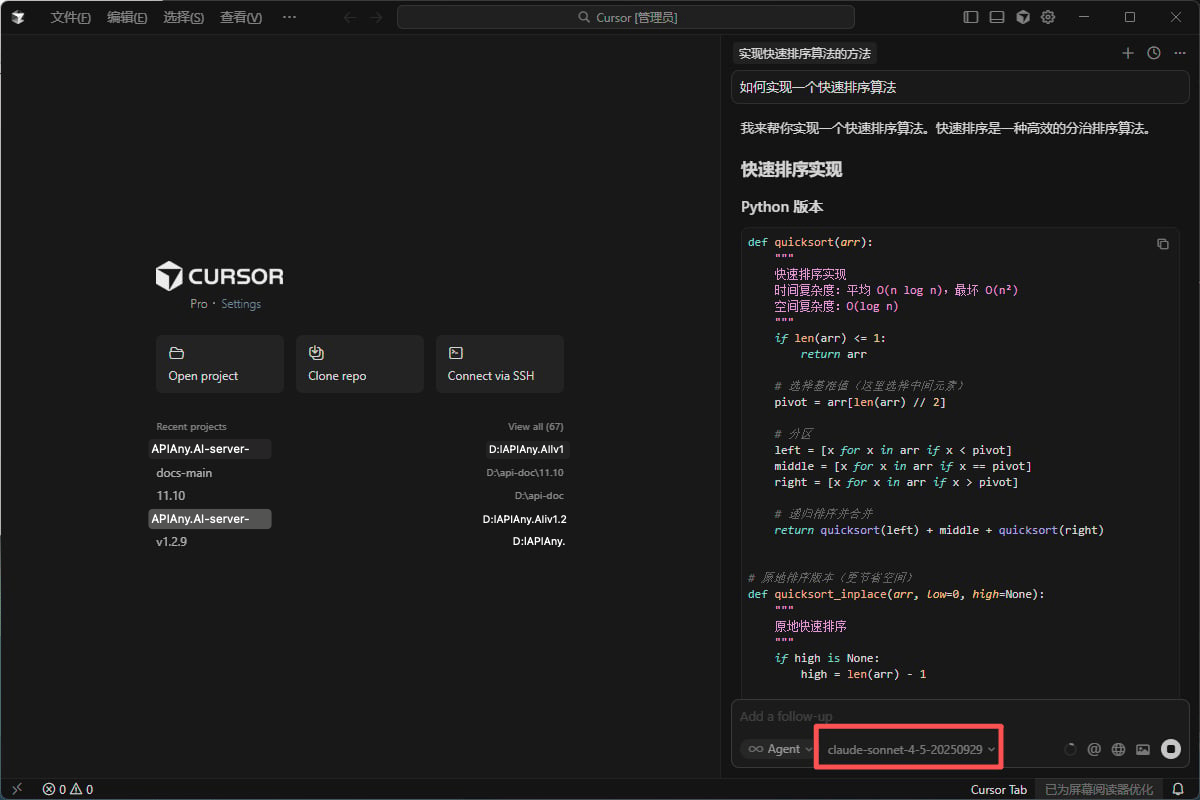
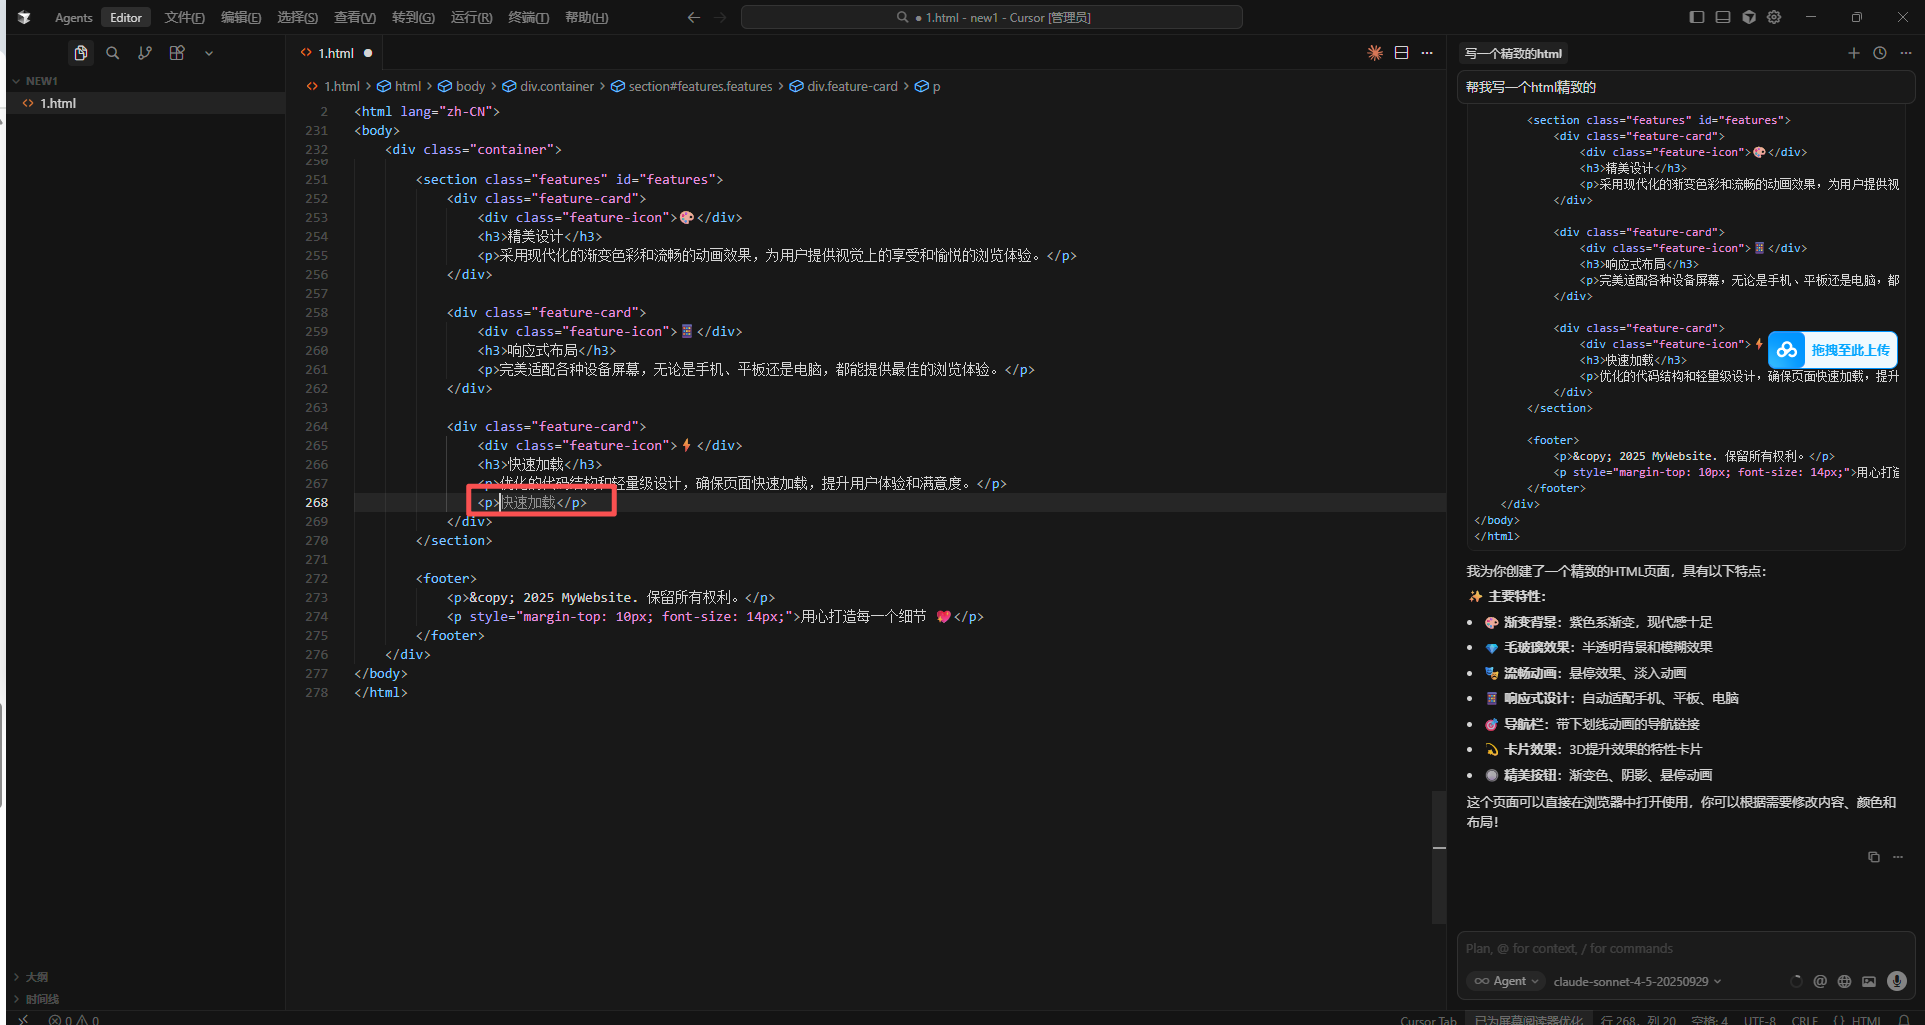
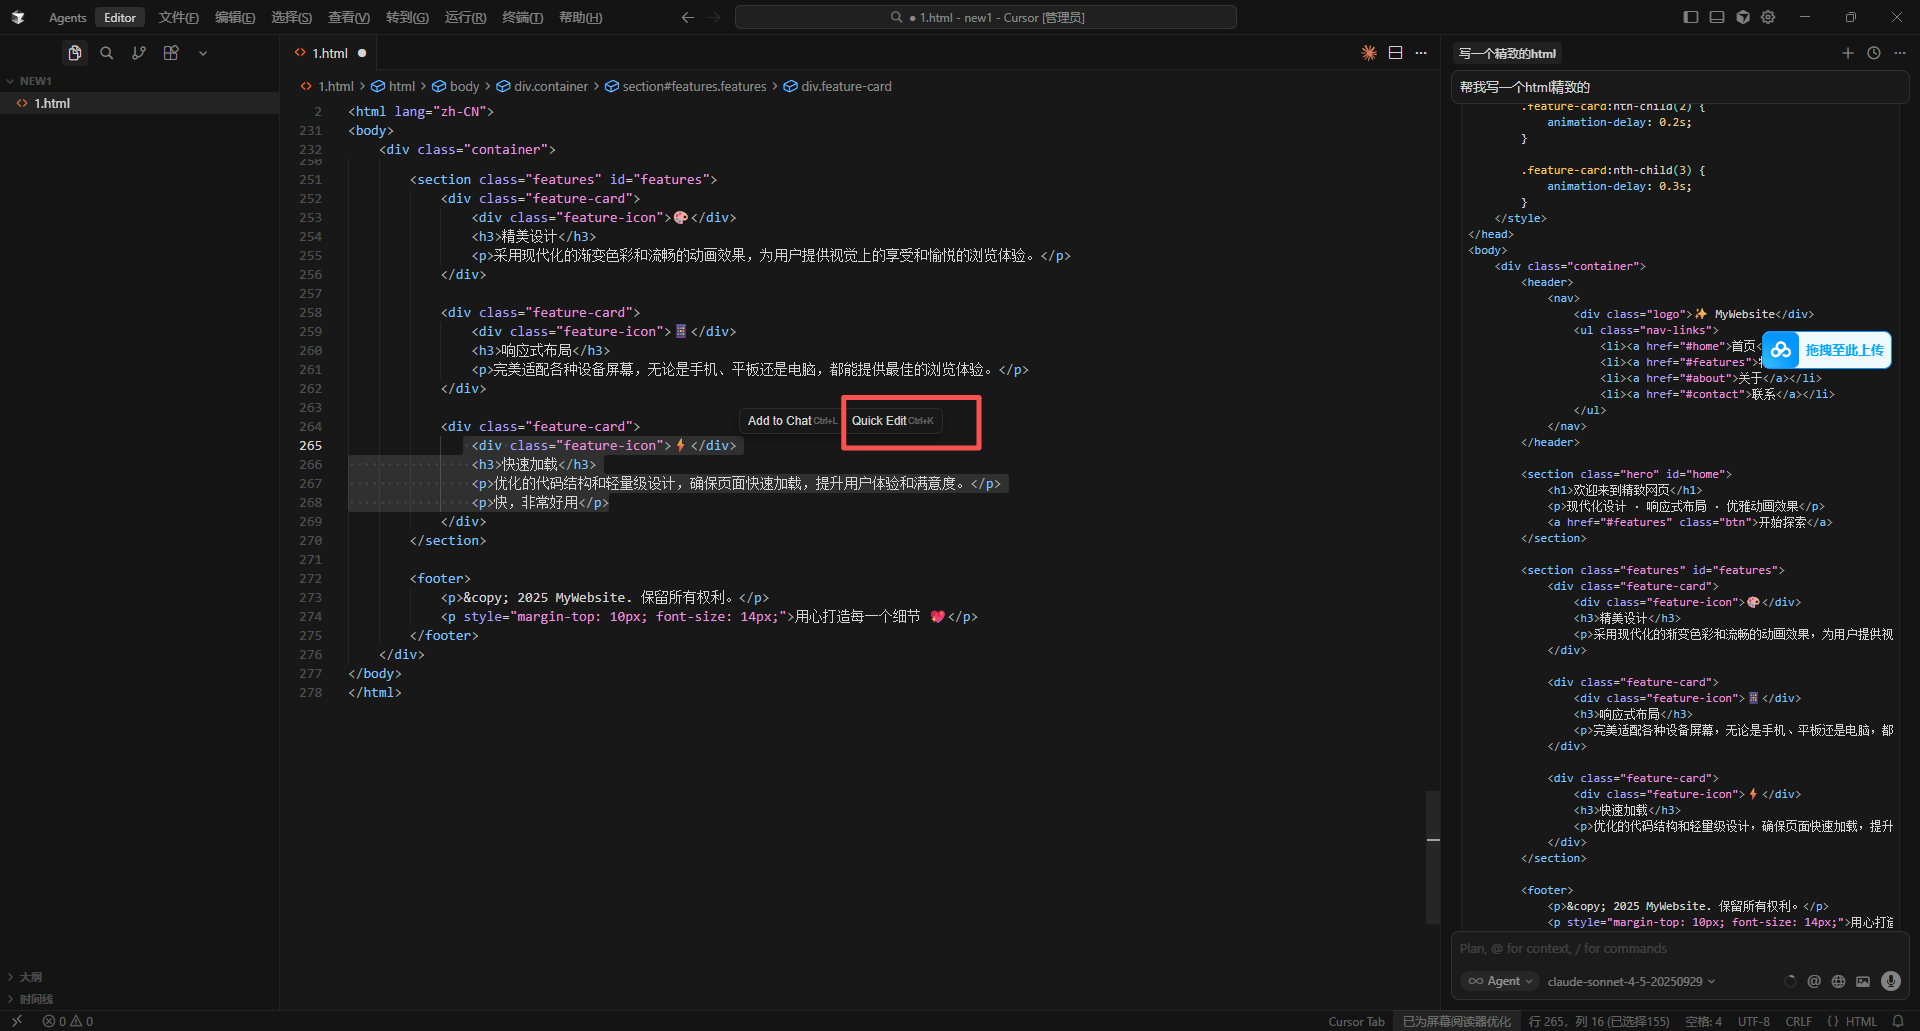
Die folgenden Screenshots zeigen die wichtigsten Konfigurationsschritte in Cursor. API-Namen und Endpunkte wurden für APIAny.AI angepasst.
### Schritt 1
 ### Schritt 2
 ### Schritt 3
 ### Schritt 4
 ### Schritt 5
 ### Schritt 6
 ### Schritt 7
 ## Fehlerbehebung
### 401 oder Authentifizierungsfehler
Stelle sicher, dass der API Key vollständig kopiert wurde, keine überflüssigen Leerzeichen enthält und im APIAny.AI Dashboard aktiviert ist.
### Das Modell erscheint nicht in der App
Gib die Modell-ID manuell ein und prüfe, ob sie im [Modellkatalog](/de/models/chat-models) verfügbar ist. Manche Tools rufen Modelllisten nicht automatisch ab.
### Welche Base URL soll ich verwenden?
OpenAI-kompatible Einstellungen verwenden in der Regel `https://apiany.ai/v1`; Claude-kompatible Einstellungen verwenden in der Regel `https://apiany.ai`; Tools, die einen vollständigen Endpunkt verlangen, verwenden `https://apiany.ai/v1/chat/completions`.
## Fehlerbehebung
### 401 oder Authentifizierungsfehler
Stelle sicher, dass der API Key vollständig kopiert wurde, keine überflüssigen Leerzeichen enthält und im APIAny.AI Dashboard aktiviert ist.
### Das Modell erscheint nicht in der App
Gib die Modell-ID manuell ein und prüfe, ob sie im [Modellkatalog](/de/models/chat-models) verfügbar ist. Manche Tools rufen Modelllisten nicht automatisch ab.
### Welche Base URL soll ich verwenden?
OpenAI-kompatible Einstellungen verwenden in der Regel `https://apiany.ai/v1`; Claude-kompatible Einstellungen verwenden in der Regel `https://apiany.ai`; Tools, die einen vollständigen Endpunkt verlangen, verwenden `https://apiany.ai/v1/chat/completions`.